How I built a Mud Kitchen for less than £10!
 I am sure the majority of us have heard about the magic of Mud Kitchens, yet how many of us out there have a bottomless pit budget and can afford to a buy one that is beautifully and professionally built? Teachers are known for their skills in keen-eyed scavenging and this skill was perhaps more essential than the basic DIY skills needed to make the kitchen.
Let me just make it clear that I am in no way a DIY expert. I just about understand that a nail goes in sharp end first and I have been known to recite loudly the rhyme ‘righty tighty, lefty loosey’ when using screws!
So bearing this in mind, here we go!
Step 1: Wood – Pallets are fantastic. Try contacting local builder’s merchants or take a quick trip round local industrial estates. Quite often these companies have to pay to get rid of the pallets when they are finished with them. I got mine from an electrical engineering company who gave me as many as I could fit in my car for free.
Bear in mind they may have nails and screws sticking out so grab a hammer and bash any you see or pull them out with pliers. They will also need sanding. Sand paper is really cheap and it is of course a lot easier if you manage to charm someone in to lending you an electric sander.
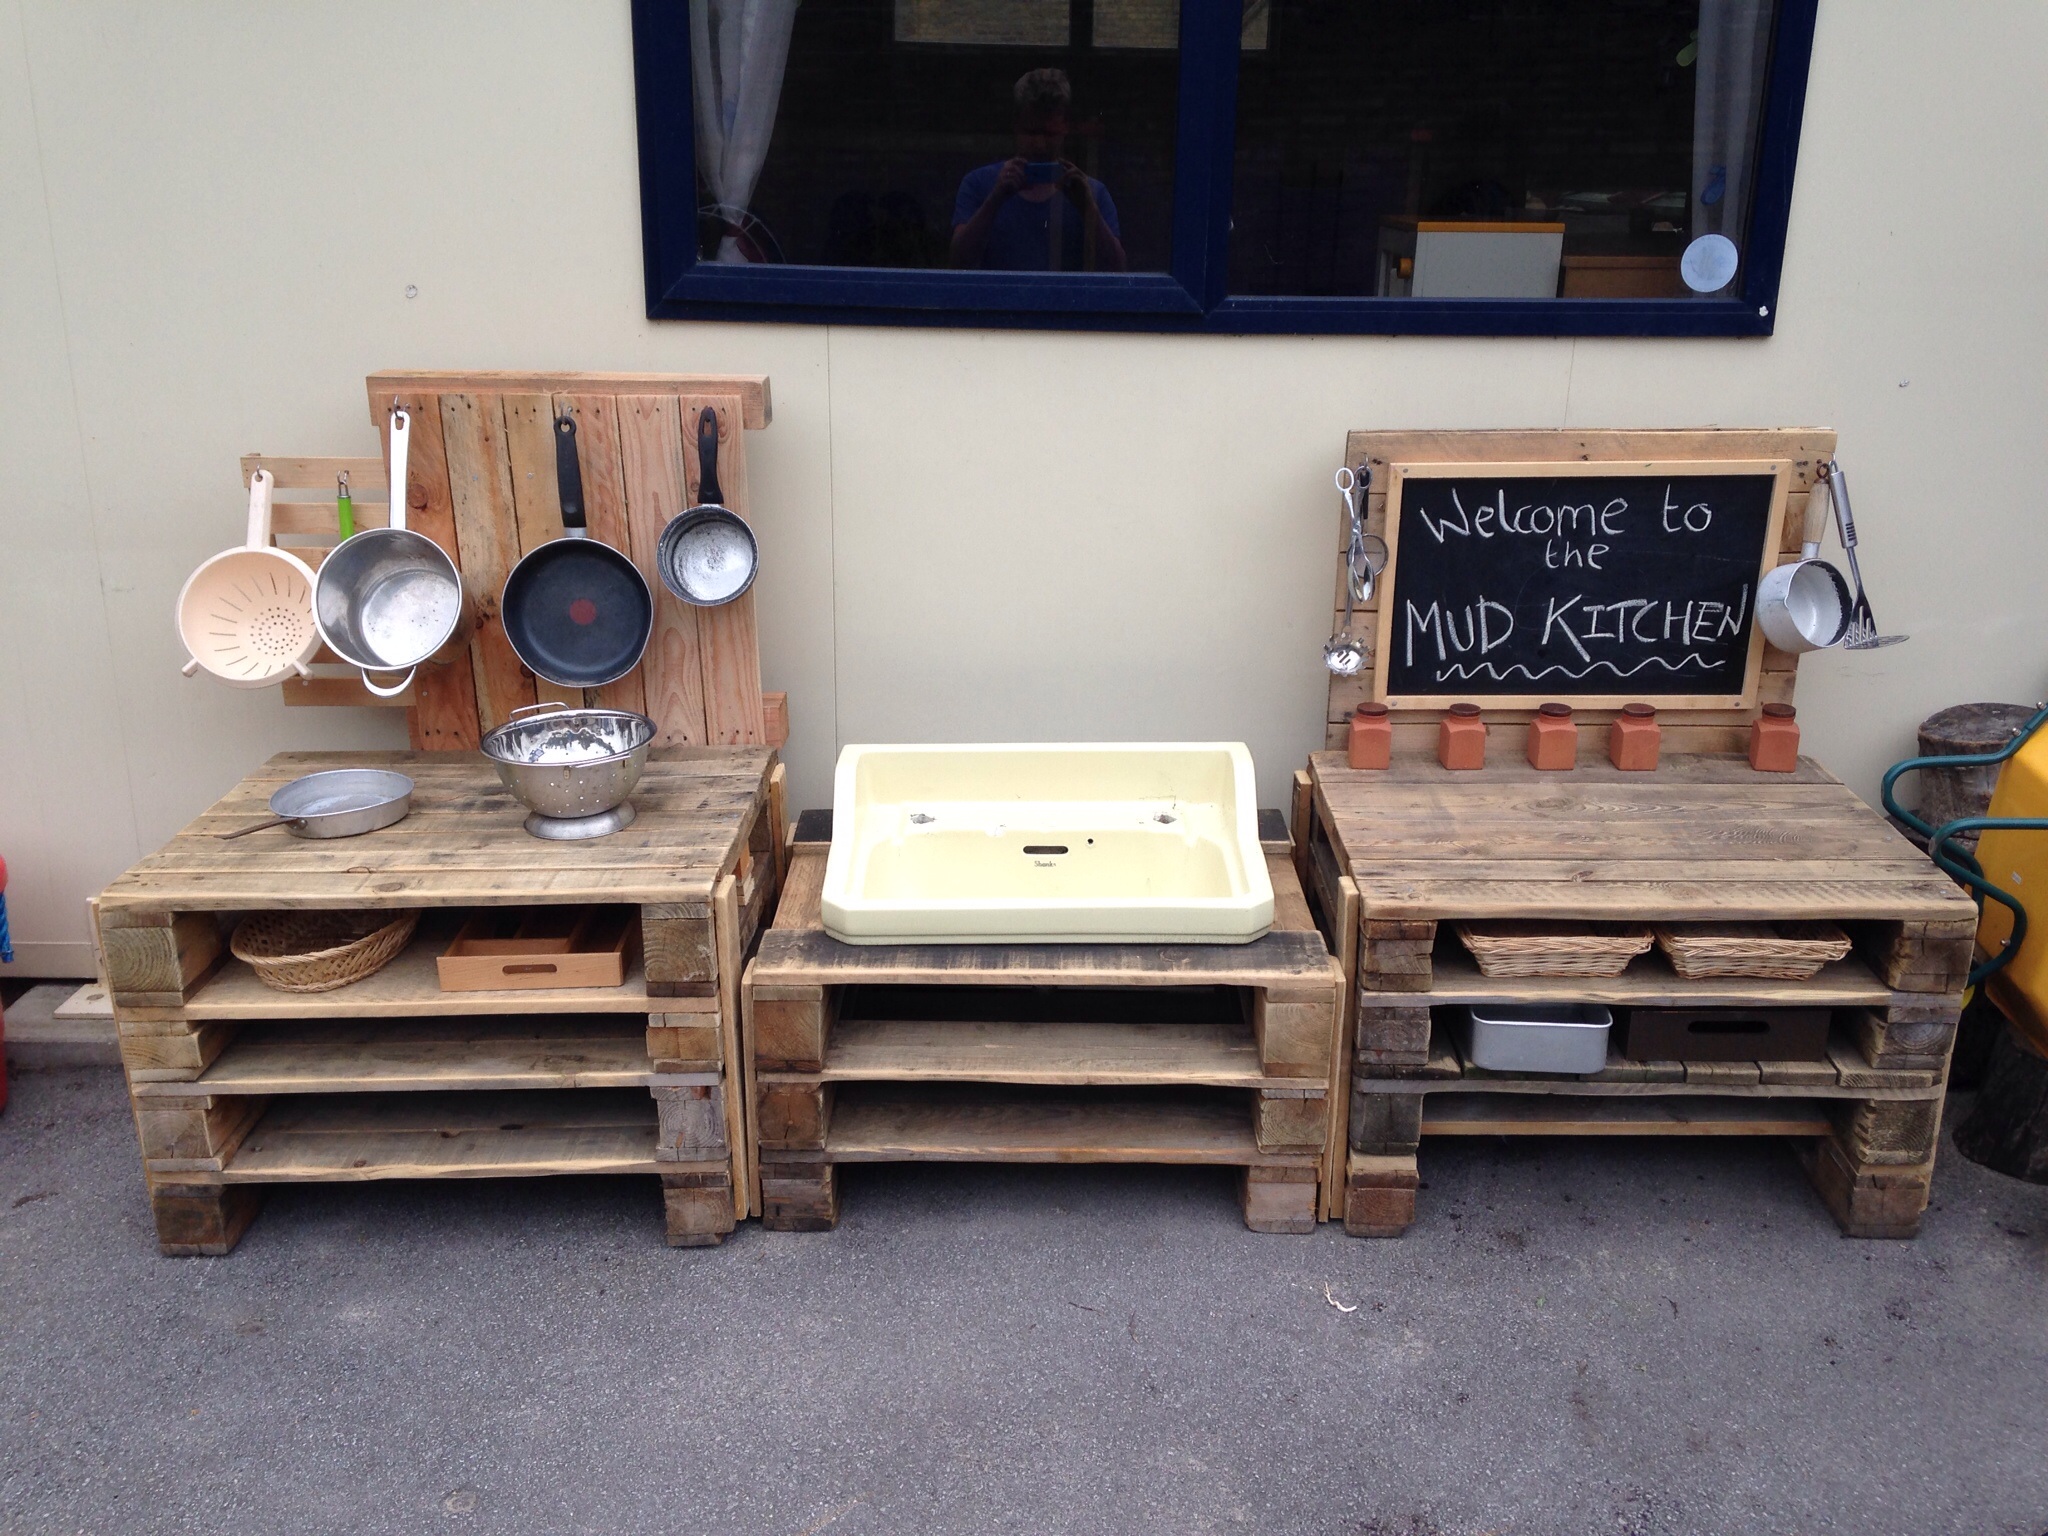
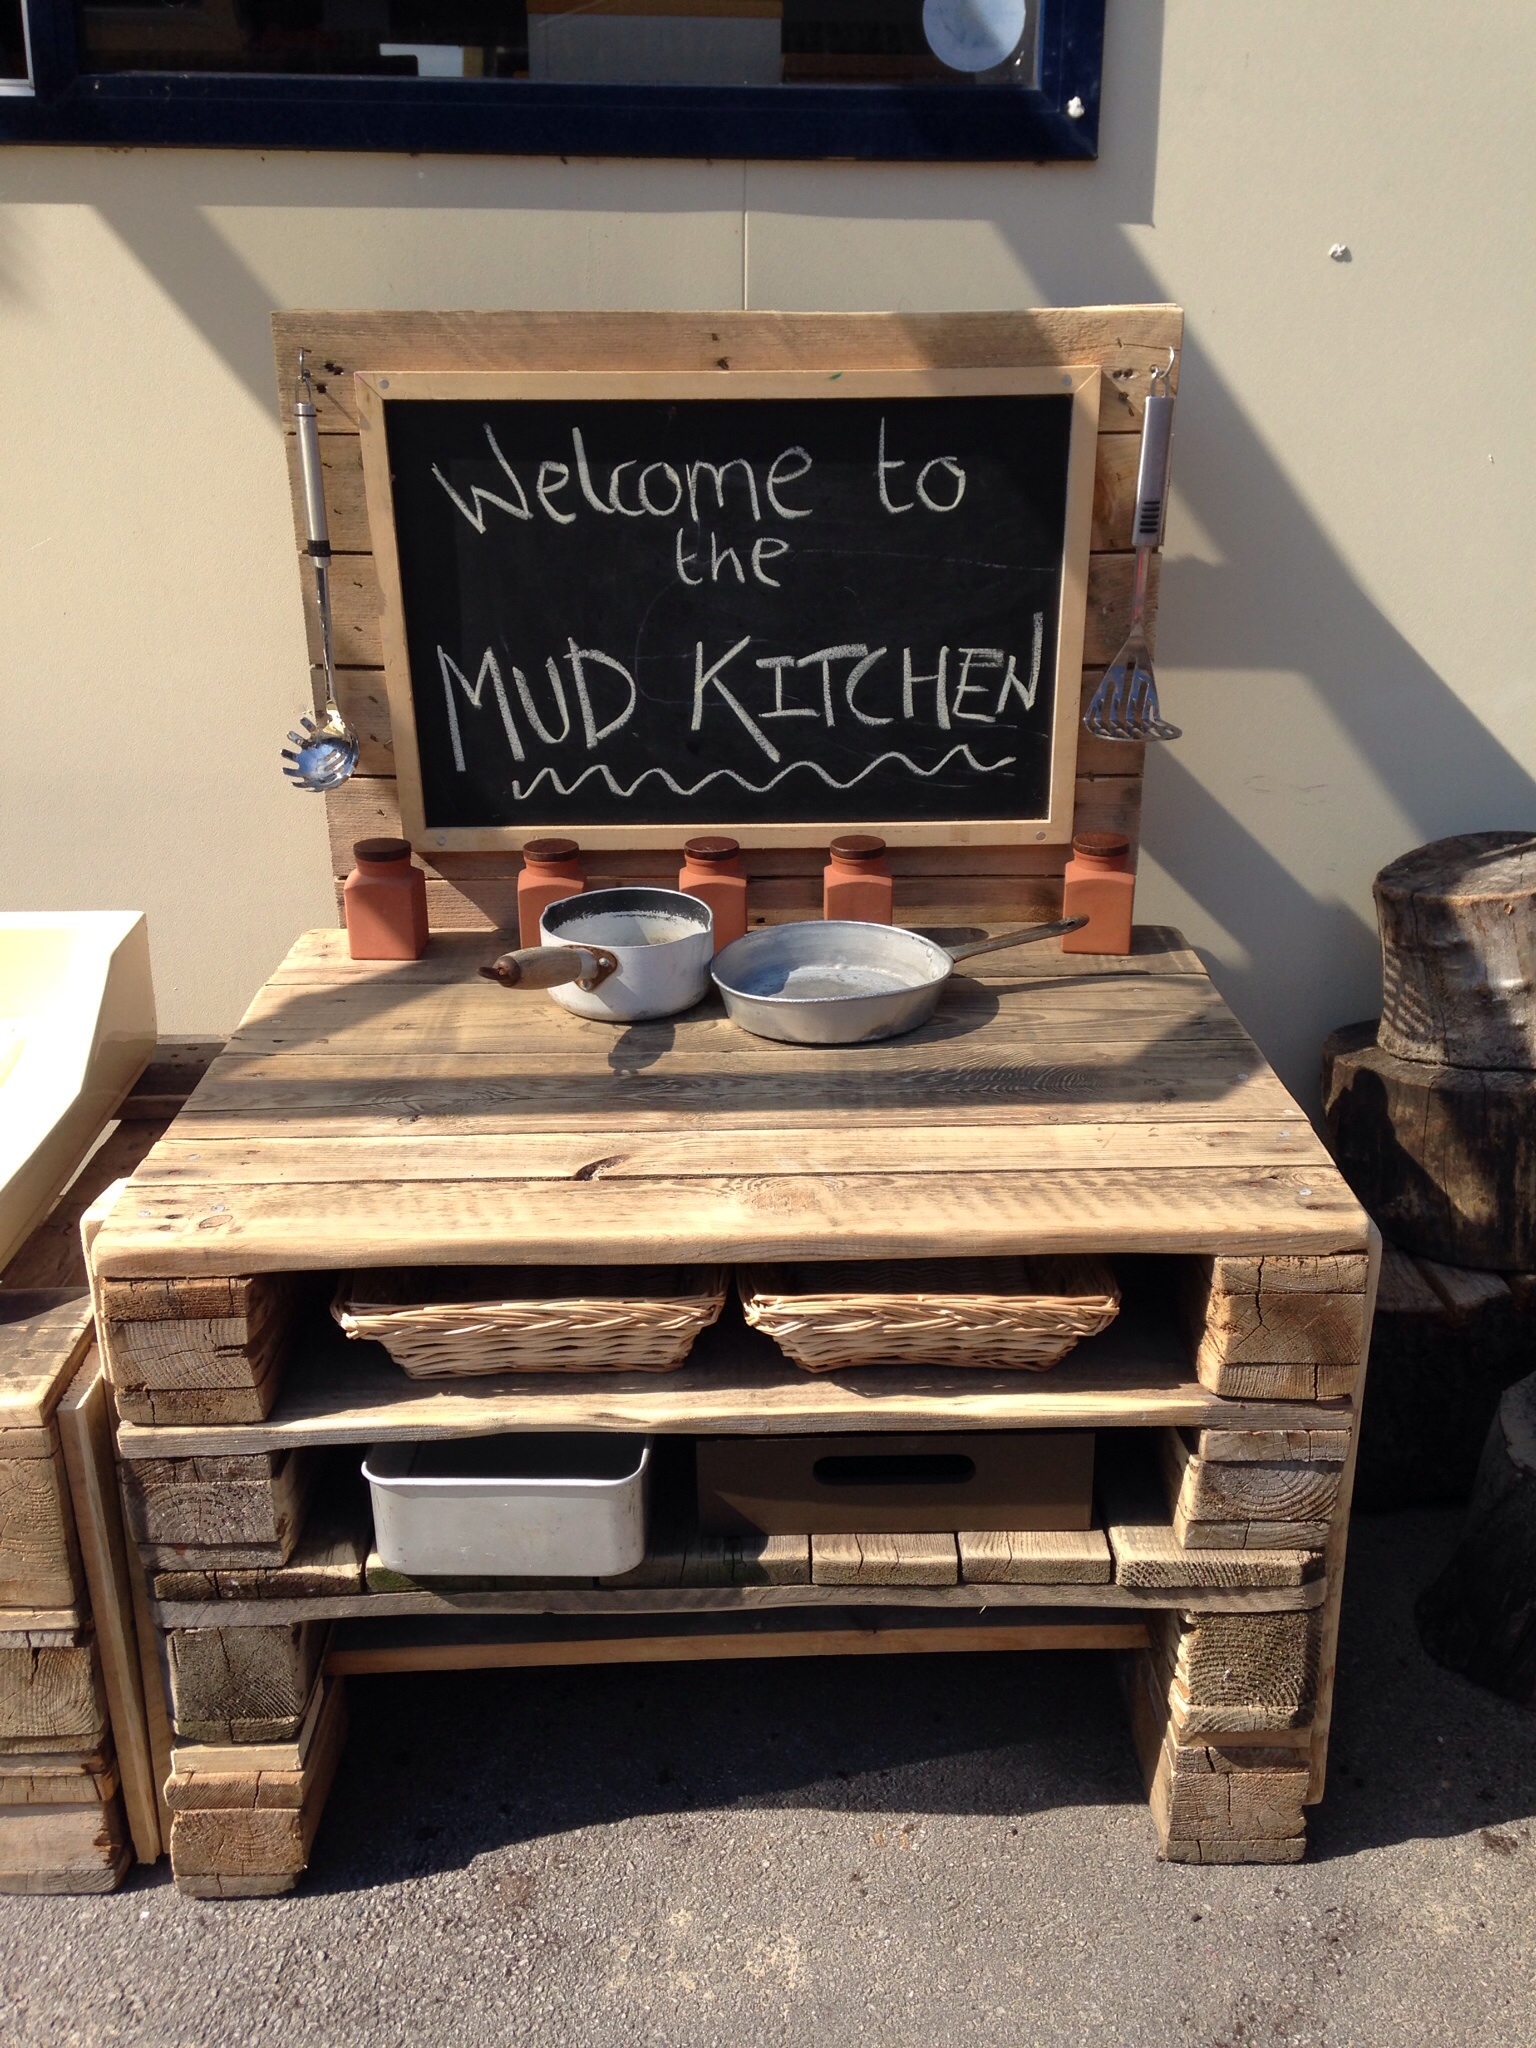
Step 2: To fasten the pallets together I made a stack of four that were the same size and then using spare planks from another pallet I simply screwed them together down the side. Then I stood a larger pallet on it’s end and screwed/nailed it to the stack to create a splash board to the work surface. (Awful instructions, I know, but hopefully the photos below will help).
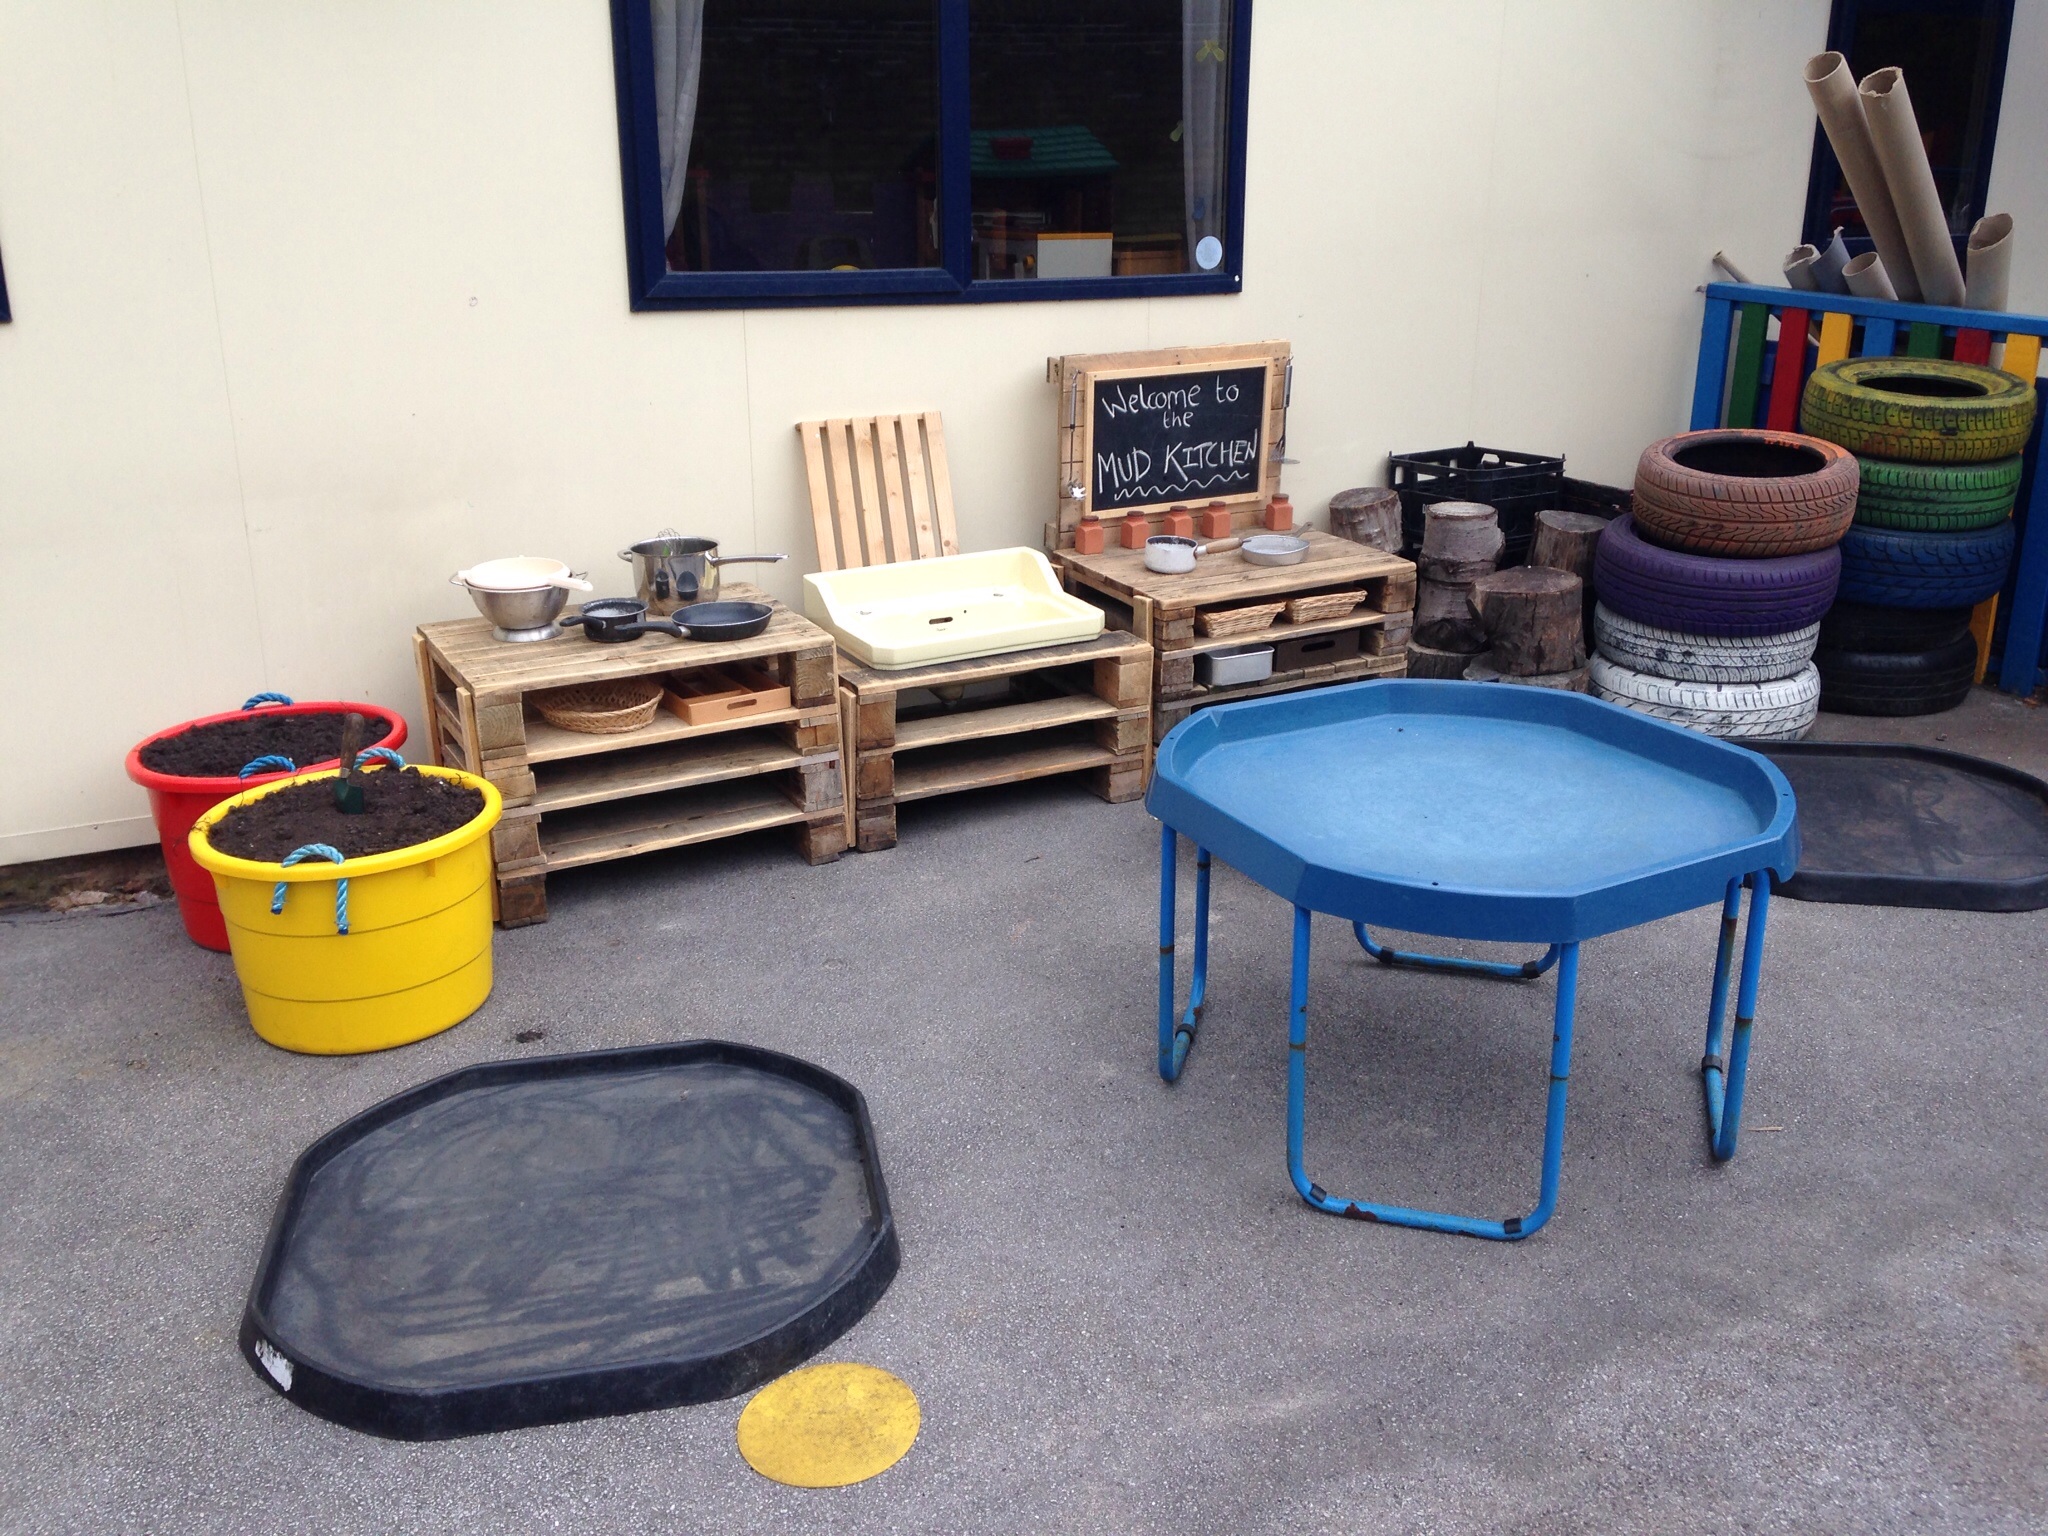
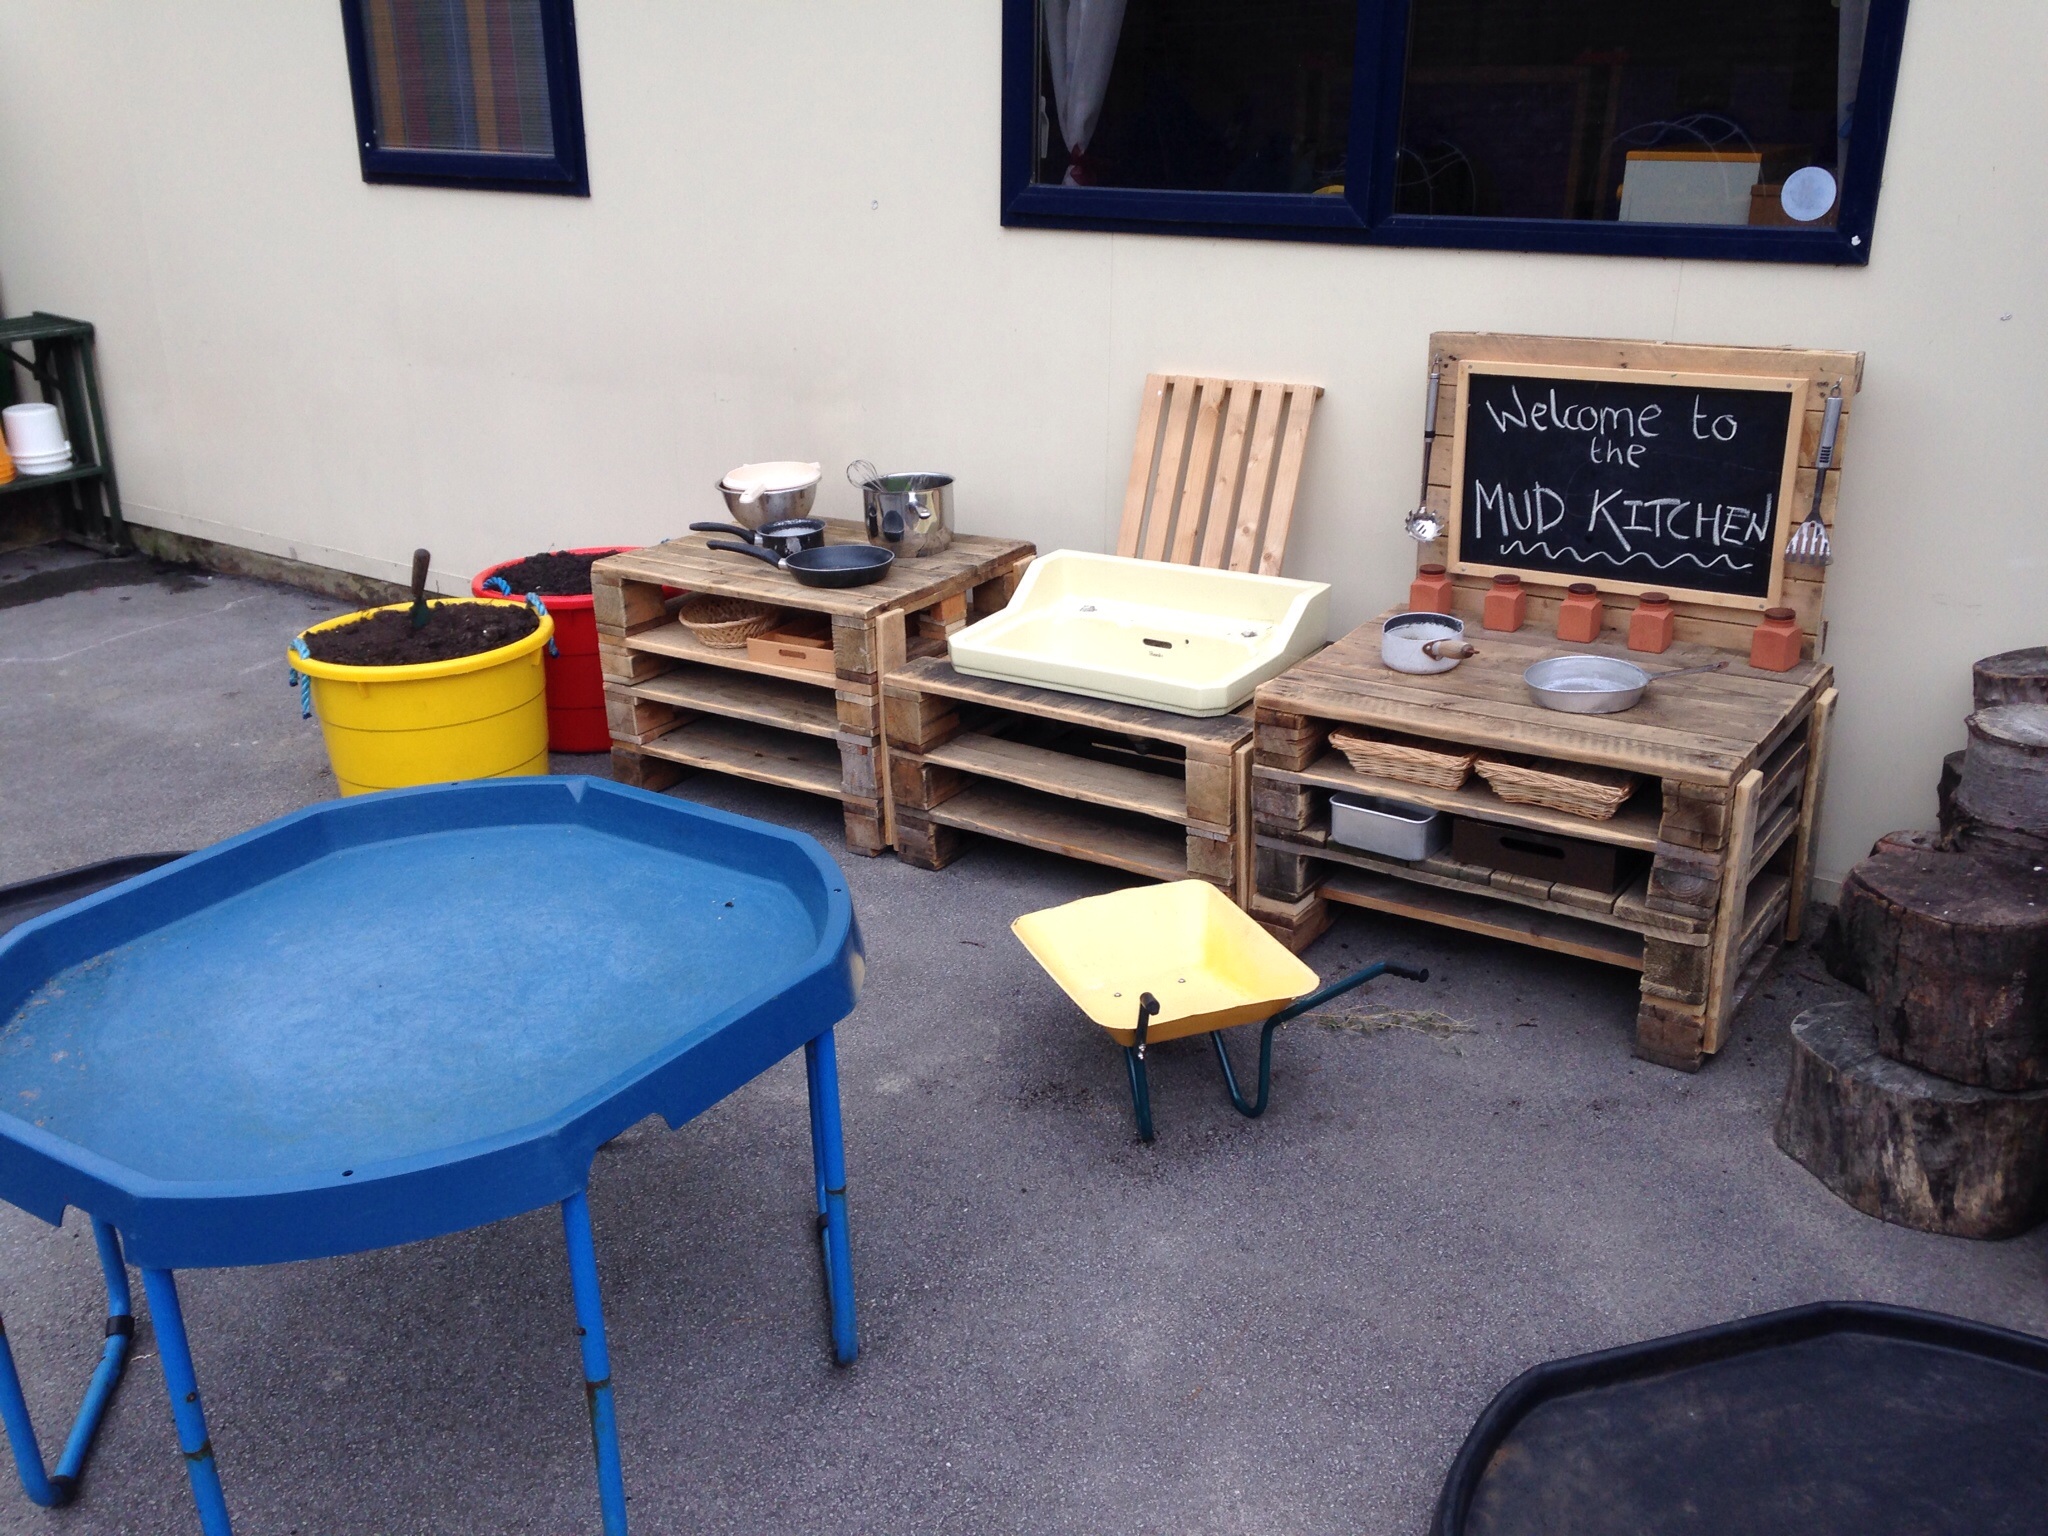
I repeated this process three times. The only exception was that on one stack I used a jigsaw to cut out a gap to set the sink into. The sink was a big investment for the future, a whole 99p from our budget was spent wisely after finding a local advertisement on eBay. I also decided that all three units should remain independent of each other so that the layout can change to meet our needs.
Step 3: Resourcing – This is where your scavenging skills come into play. So far I have managed to get everything for free, or through charm and cups of tea managed to persuade people to lend me tools and give me nails and screws.
I love charity shops and car boots sales. I know not everyone shares my passion, but where else would I have got some of these things so cheaply?
I tried to avoid plastic and concentrated on wood and metal items and setting myself a limit of £10 I hopped off to the local car boot sale. Baking trays and shallow wicker baskets make great shelves and storage. Utensils of all shapes and sizes are great and easy to hang along the back of the units. My favourite and most expensive item was small earthenware pots for £2. Ok, they might get smashed, but they are great for keeping precious items and treasure. If we model how delicate and special they are then the children will follow.
A chalk board was the final essential item for writing down all those delicious recipes and after some digging round the school cellar I found one that was going unloved.
And that was pretty much it!
I know that this instruction guide is not perhaps IKEA standard, but hopefully after reading it you think “well if he can do it, why can’t I?”
(Feel free to email me if you need a translation of anything I have written!)
Matthew