This half term my theme is “Light up my life” with a focus on investigating light and dark. Whilst flicking through Pinterest for inspiration I noticed a great deal of activities relied upon the use of a light box- a classroom accessory to which unfortunately most classroom budgets just will not stretch! However, Pinterest being the wonderful fountain of knowledge that it is, it didn’t take me long to find a DIY version. I have altered some of the method slightly and I’m very pleased with the result.
You will need:
- A large plastic under-bed storage box- it is best if the plastic is frosted rather than clear, but either would work. (I used a ‘Samla’ from Ikea- £9.50)
- A string of bright white fairy lights, battery or mains powered. (Mains generally give a brighter light)
- 1 thick black bin liner (rubble bags work well)
- 2 white bin liners
- Scissors
- Sticky tape

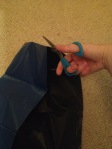
Cut the black bin liner into strips to match the height of the box. Open out the strips.
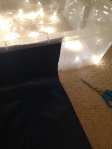
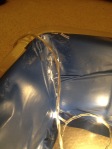
Attach the strips all around the edge of the box so that the light will be concentrated upwards towards the lid.


Cut the bottom off the white bin liners and open them out. Lay one on top of the other and cut both to fit the lid. Attach them in a double layer. This will allow the light to be dispersed more evenly.


If you are using lights that plug into the mains, the wire can lay over the edge and the lid will still shut.
Attach the lid, turn off the lights and admire your creation!

I can’t wait to see what the children make of this in our dark den! If you have a go at making your own light box, we’d love to hear about it. Send us your photos and we may feature them on the blog!
Happy making!
Hannah
